


Your face needs special TLC to look its best, which is why many like to have regular facials with their favorite esthetician. However, not everyone has the money to pamper themselves on the regular since facials aren’t always cheap.
But there’s good news if you want radiant, glowing skin almost for free!
You can easily give yourself a homemade facial using ingredients you probably already have at home in your kitchen and pantry. Sure, it may take a bit of extra time than normal, but the end result is totally worth it! Here are some tips on how to have an amazing homemade facial that rivals professionals:
Content:
1. What is a homemade facial
2. The 8 laws to your facial at home for best results
3. Do homemade facials really help to erase fine lines
4. What are the best ingredients for best skin results
5. How much money can you save
6. Ready facial at home kits: are they worth the money
7. How to make your own facial at home – “The Secret Formula” revealed
8. My best recipes for a homemade facials incl. homemade face scrubs and diy face mask
8.1 Home Made Face Scrub Recipe
8.2 Recipes To Improve Your Skin Tone
8.3 Recipes For Glowing Skin That’s Wrinkle Fee
8.4 Recipes To Get Rid Of Acne With A DIY facial
9. Final Recommendations
What is a Homemade Facial
A homemade facial has one sole purpose: to pamper your skin, clean and rejuvenate without spending too much money at the comfort of your home.
Exfoliation is key
You should already be exfoliating regularly, but not many actually take the time to do it at home. When you exfoliate, you help scrub off dead skin, dirt, grime and oil that can be inhibiting you from having amazing skin. To properly exfoliate you’ll need to remove all of your make up and rinse your face with warm water. So that you can get all of that junk out of your pores, steam your face over hot water or press a warm towel to your skin for two to three minutes. After you’ve prepared your homemade exfoliating scrub, apply it to your face and then rinse off with warm water.
The Ingredients
When pampering yourself with a homemade facial, pay close attention to the ingredients. Food has been used in facials for centuries and some can help with dark circles under your eyes, wrinkles, fine lines and more. I have developed a formula that I reveal later that includes 3 easy Steps for your homemade facial and all you need to do is find the right one for your skin or problem areas. I give recommendations for each skin type and recipe I developed.
The Tools
You don’t need much for a DIY homemade facial. I always suggest a small bowl and fork to mix the ingredients. Although, you might want to use a scrubber or some sort of cloth to help you with the homemade scrub to better exfoliate your skin and later on a brush to apply the facial mask. But you’re hands will do also just fine!
You can get any of the results below…
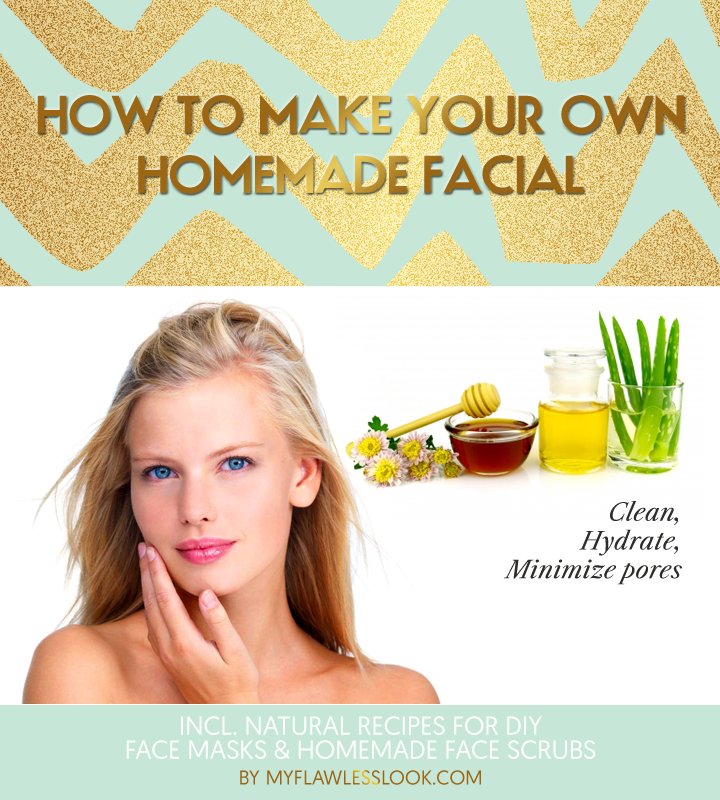
- Minimize pores
- Skin cleansing
- Reduce wrinkles
- Tighten skin
- Hydrate and nourish skin
….IF you apply the right formula to your homemade facial. You need to start with a homemade face scrub, then move on to a homemade face mask and complete your homemade facial with a moisturizer. I have developed a formula that includes the right ingredients and amounts for getting all the results above. I will reveal my formula later and I tell you how to apply this formula in my top homemade facial recipes.
The 8 laws to your facial at home for best results
1. Apply the right ingredients together with the secret formula
It is essential that you use high quality organic ingredients when you prepare your facial at home. What does organic mean: organic foods come from animals that are given no antibiotics or growth hormones. Organic nutrition is prepared without using most conventional pesticides; fertilizers made with synthetic ingredients or sewage sludge; bioengineering; or ionizing radiation. Whichever recipe you decide on make sure the ingredients I mention are organic. Together with the secret formula I reveal later here your homemade facial will give you the best results.
2. Always exfoliate (start with the homemade scrub)
Why is exfoliation so important? You need to get rid of dead skin cells before you apply your face mask. You want the juices reach the lower epidermis to bring the best out of your skin. This is why I include a homemade scrub in every facial at home regimen.
3. Invite a girlfriend or family member
When its home made facial time at my house I always invite my girlfriends and we have a small party. My girlfriends appreciate it when I use double the amounts of ingredients so we all can have a facial and help each other applying the product on our face. In the end we compare the results, take pictures, lough a lot, watch a movie or sometimes go out to our favorite pub. Facials at home is a great way to bond with the girls.
4. Do a 15 min workout warm up
Hmmm exercising I know some of you don’t like to want to move in the afternoon and get sweaty. But believe me your skin will absorb the ingredients much better when you do a 15 min workout before your facial. The bloodstream continuously transports oxygen and nutrients to the brain, skin, and vital organs in the body. By increasing the blood flow, exercising helps nourish skin cells and improves your skin complexion.
5. Drink green tea and plenty of water before the facial
Green tea has antioxidants that benefit your body in many ways and can even be used to treat acne. Green tea contains enzymes, amino acids, and phytochemicals like polyphenols. It also has B vitamins, magnesium and caffeine. To enhance your skin tone, you can use green tea in your home made masks. I also included green tea in my recipes below. Also, drink a few cups of this popular beverage before doing your facial at home.
6. Use a head band
Use a flexible head band to cover your hair. You don’t want your hair get in touch with the ingredients.
7. Don’t take a full body shower after the facial
After your facial at home you should not wash your face, neck and décolleté with soap. At least for 24 hours, you must not wash your face with any soap, facial wash or other chemicals. Only take a cloth rinse it in warm water and wipe off the face mask left overs. Do not steam your facial skin at all post-facial. Give your skin time to absorb all the product ingredients.
8. Rest
Try to take a nap after a facial and avoid rushing back to work or doing any other activity. Avoid any stressful activities for some time.
Do homemade facials really help to erase fine lines
Not everyone has the funds to go out and get facials every week to help them erase fine lines and wrinkles. But the good news is that you don’t have to be a millionaire to treat yourself and your skin to facials every week thanks to hundreds of homemade facial recipes that will do the job (or even better) without breaking the bank! You can easily pamper yourself with a homemade facial any time you want, using ingredients you most likely already have in your kitchen. Or you can make a girl’s night in or a mom’s night with a few of your favorite girls and pamper yourselves with homemade facials that will soften and freshen your skin while also helping to erase fine lines and wrinkles.
So if you really want to know if homemade facials are just as good as the ones you get at a spa by a professional, the answer is yes! And they are way cheaper, allowing you to have amazing skin at a fraction of the price! To get a spa-worthy homemade facial that will erase fine lines and wrinkles, you just need to know what sort of ingredients to use. You’ll want to use natural anti-aging skin care ingredients that will help make your skin look younger. Here are a few ingredients you’ll definitely want to use in your homemade facials for younger looking skin:
What are the best ingredients for best skin results
Aloe Vera are used in many facial recipes and can really help your skin look younger. Aloe Vera is rich in antioxidants that will help minimize the formation of free radicals in the environment that will cause early aging. It’s also a moisturizer that will help your skin feel softer.
Fruits – not only should you be eating the right amount of food each day to stay healthy, but you can also use them in a number of homemade facial recipes. Fruits like bananas are great to smash up and use in a facial since it’s packed with vitamin B, which prevents aging and will hydrate your skin’s cells at the same time!
Spices – You use spices to help add flavor to your food and they can work wonders on your skin! Spices like cinnamon and nutmeg can help give your skin a white glow as they flush out toxic chemicals. Nutmeg in particular will make your skin plum and helps reduce the appearance of fine lines and wrinkles.
How much money can you save
Most people already have all the ingredients at home to make a diy facial. Sometimes you need to invest as little as $ 10 to buy additional ingredients to get the best results. Remember going to the Spa for a facial will cost you at least between $ 60 and $ 100. This is just for a basic facial. In addition diy facials will leave you with left overs that you can store in your refrigerator to use it later or for several facial sessions. Taking in consideration the face scrub plus the ingredients for about 3 facial sessions I came up with a DIY facial cost under $ 4 per session.
Ready facial at home kits: are they worth the money
I came across some ready facial at home kits that are available on the market such as this: Bioelements New Triple-Action, Rapid-resurfacing Facial Kit
It is a great facial kit and has got some good reviews. This is triple resurfacing at-home facial. It contains 4 facials inside every box totaling $ 40, so you pay in fact $ 10 per facial. Not bad. It features Chinese herbal granules that reveal fresh new, glowing skin with dual physical and chemical skin exfoliation.
It’s followed by a leave-on moisturizing gel with powerful beta and alpha hydroxyl acids.

My recommendation is if you can spare $ 40 for this facial at home kit and you don’t want to deal with mixing up ingredients; its worth the money. Otherwise read on and try out my own recipes below.
How to make your own facial at home – “The Secret Formula” revealed
Using organic ingredients together with the correct amounts is the only way to get the results you are looking for. I will recommend some specific ingredients such as honey and spices. One ingredient might help you to erase fine lines some others will give you a glowing skin. Lets dive deeper into which ingredients will get you what results!
My secret formula revealed:
Exfoliation plus Goal specific ingredients equal Best DYI Facial!
1st Step: Always exfoliate
2nd Step: Define your Goal: Do you want to erase fine lines, treat acne or improve your skin tone?
3rd Step: Use the ingredients I specified below according to your goal and Repeat!
FYI these are the best ingredients to include in a facial to erase fine lines and for glowing skin (just keep them in mind):
The best ingredients to include in a facial for exfoliation:
- Organic Honey
- Sugar
- Organic Oatmeal
The best ingredients to include in a facial to treat acne:
My best recipes for a homemade facials incl. homemade face scrubs and diy face mask
Always do a home made facial scrub before you apply the mask and moisturizer.
A scrub is just as good as a mask and a sugar and honey mixture can help slough off any dead skin cells so that you get an even skin tone and your DIY facial mask will penetrate much better into your skin.
Facial Scrub Recipe
Ingredients: 1 tsp sugar, 1 tbsp of Organic Honey, 1 tsp of Organic Oatmeal (to make the exfoliant softer)
Directions:
- Mix all ingredients together in a bowl
- Using small, circular motions, rub the mixture on your face to get rid of dead skin cells.
- Rinse it off with warm water.
Now you are ready for the homemade facial. Here are my top recipes:
Recipes To Improve Your Skin Tone Using A DIY Face Mask
Your skin faces a lot throughout your day, especially your face. With environmental pollution, overexposure to the sun and any medical conditions you may have can all attribute to dull and dark skin. Not to mention combine that with stress, use of chemical-based cosmetics and skin products and poor lifestyle choices and you’ve got a recipe for uneven skin, which is the opposite of the flawless face you want to achieve. Even though you can buy skin lightening and evening creams at the store, these products are loaded with harsh chemicals that can actually damage your skin even more. Instead try these homemade DIY face masks to help improve your overall skin tone!
Yogurt Face Mask
Yogurt may do your body good, but it also helps improve your skin tone thanks to its numerous nutrients it has that are good for your skin like lactic acid that has bleaching properties.
Ingredients: 3 tbsp plain yogurt, 1 tbsp of honey, 1 tbsp of lemon juice, 1 tsp of oatmeal
Directions
- Mix all of the ingredients in a bowl evenly.
- Gently rub the mixture onto your skin.
- Leave on for five to ten minutes and wash off.
Finish this facial with a light moisturizer like with the Retinol Moisturizer from Radha.
Orange Face Mask
Orange is loaded with vitamin C and is great for naturally lightening your skin tone since it’s packed with natural bleaching properties so that you get even and smooth skin.
Ingredients: 2 tbsp of orange juice (fresh), Pinch of turmeric powder
Directions
- Mix the orange juice with just a pinch of turmeric powder and mix the two together until you form a thick paste.
- Cover your face with the mixture and leave it on for ten minutes.
- Wash it off.
Finish this facial with a light moisturizer like with the Retinol Moisturizer from Radha.
Recipes For Glowing Skin That’s Wrinkle Fee
The last thing a woman wants to see on her face is wrinkles. They’re dreaded by women young and old and remind them that their youth is starting to fade. But this doesn’t always have to be the case! Even though wrinkles are a natural biological process of aging, you can do something to minimize their appearance so that you’re just left with glowing skin. Although you can buy the most expensive creams and lotions, here’s a face mask you can make at home to get rid of wrinkles and have glowing skin!
Banana Face Mask
Bananas are loaded with lots of vitamins and nutrients that not only benefit your body, but also your face! The natural and effective DIY Banana face mask will help prevent wrinkles naturally. They are loaded with potassium, magnesium, iron, zinc and vitamins A, B, E and F that all fight the signs of aging. And the best part is that it’s super easy to make! And you might just be tempted to eat it, too!
Ingredients: 2 ripe bananas, 2 tablespoons of seaweed powder, water, Blender or food processor
Directions
- Peel the banana and remove the skin. Cut it into a few big chunks.
- Toss in the blender until it’s a smooth and uniform paste.
- Add 2 tablespoons of seaweed powder and 1 tablespoon of lukewarm water.
- Blend well.
- Apply the paste to your face and neck and then let it dry for 25 to 30 minutes before you wash off with warm water.
- Repeat the process three times a week to help with wrinkles.
Aloe Vera + Vitamin E Face Mask
Aloe Vera is used a lot in the beauty industry and is great for treating fine lines and getting glowing skin. It’s packed with lots of minerals, nutrients and vitamins that will not only hydrate your skin, but also rejuvenate it since it contains malic acid, which reverses the signs of aging. It’s also known for its moisturizing benefits that will minimize wrinkles.
Ingredients: 1 tsp of Aloe Vera gel, 1 tea spoon of Vitamin E oil
Directions:
- Mix the Aloe Vera gel with the vitamin E oil
- Apply the mixture to any fine lines you may have on your face and leave on there for 30 minutes.
- Repeat at least three times a week.
Don’t forget to finish this facial with a light moisturizer like with the Retinol Moisturizer from Radha.
Recipes To Get Rid Of Acne With A DIY facial
Acne sucks! It’s something that happens to all of us and even though you try and cover it up with makeup, it’s still there underneath and can get worse over time if you don’t do something about it. And there are several reasons for your acne problems, including environmental, genetics and even hormone imbalance. Although you can get a prescription from a dermatologist for acne medication or buy every acne lotion under the sun, you can easily treat your acne with a DIY home mask with natural ingredients that are good for your skin!
Cinnamon and Honey Face Mask
Honey and cinnamon are probably two ingredients that you already have in your kitchen and can work wonders for your skin. Honey has natural antibiotic properties that kill germs that cause acne, while cinnamon will kill off bacteria since it’s a natural anti-microbial.
Ingredients: 2 tbsp of honey, 1 tbsp cinnamon
Directions
- Mixt the two ingredients in a bowl and form a paste.
- Apply the mask to your entire face or use it as a spot treatment to any acne you may have.
- Let it dry on your face for 15 minutes and then rinse with warm water and pat your skin dry.
Egg White Face Mask
Eggs aren’t just great for breakfast, but also for your skin since it can decrease your acne and help fade any acne scars that are left on your face from previous episodes. They help heal the skin and help rebuild new and healthy skin cells thanks to their protein.
Ingredients: 2 to 3 eggs
Directions
- Separate the egg whites from the yolks of the eggs and whisk the mixture until it’s frothy.
- Before you put the mixture on your clean face, let it stand for a few minutes to thicken up.
- Apply one thin layer on your face with your fingers and let it dry.
- Repeat and apply two to three layers until you have four in total.
- Let it dry for at least 20 minutes before you rinse with warm water.
Final Recommendations For Your Home Made Facial
- Spot test your skin before applying the diy mask onto your whole face. This is important id you have extremely sensitive skin. Even tho the ingredients are all organic some may cause irritations.
- Do diy facials several times a week for best results.
- Apply a thin layer of diy face mask. Too much product will make the procedure messy and it won’t have any effects on your skin.
- Do not apply diy facials on children under age of 10.
- If you feel anything thats stinging on your skin rinse off the product with warm water immediately.
Leave a Reply